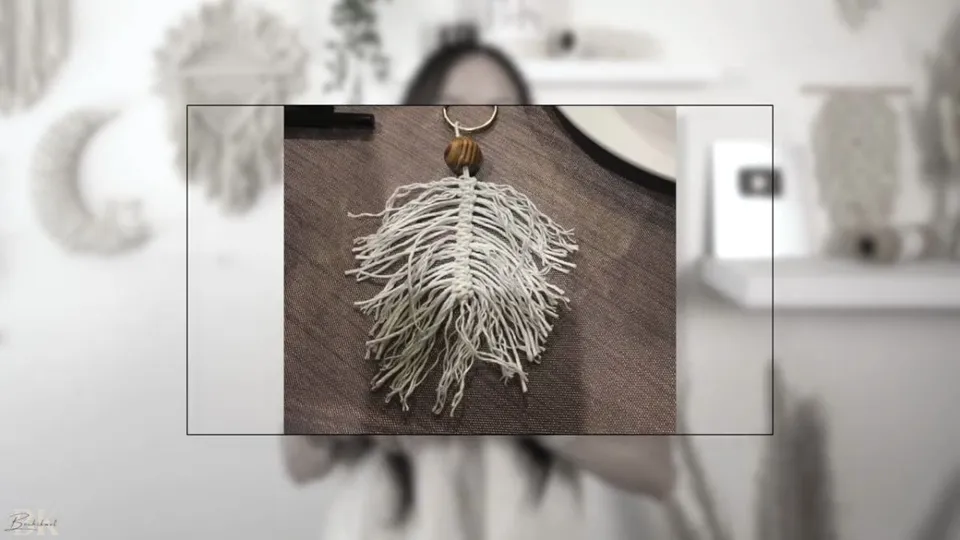
Macrame feathers are one of the best first projects you can tackle as a beginner. They use minimal knots, look beautiful when finished, and work as keychains, bookmarks, wall art, or accents on larger pieces. In this guide, you'll learn two different methods to create them — one using double half hitch knots and one using square knots. Each method takes about 20-30 minutes once you get the hang of it.
Some links in this article are affiliate links. If you make a purchase through them, we may earn a small commission at no extra cost to you. We only recommend products we genuinely use and trust.
What You'll Need
Getting your materials together is straightforward. Here's what you need:
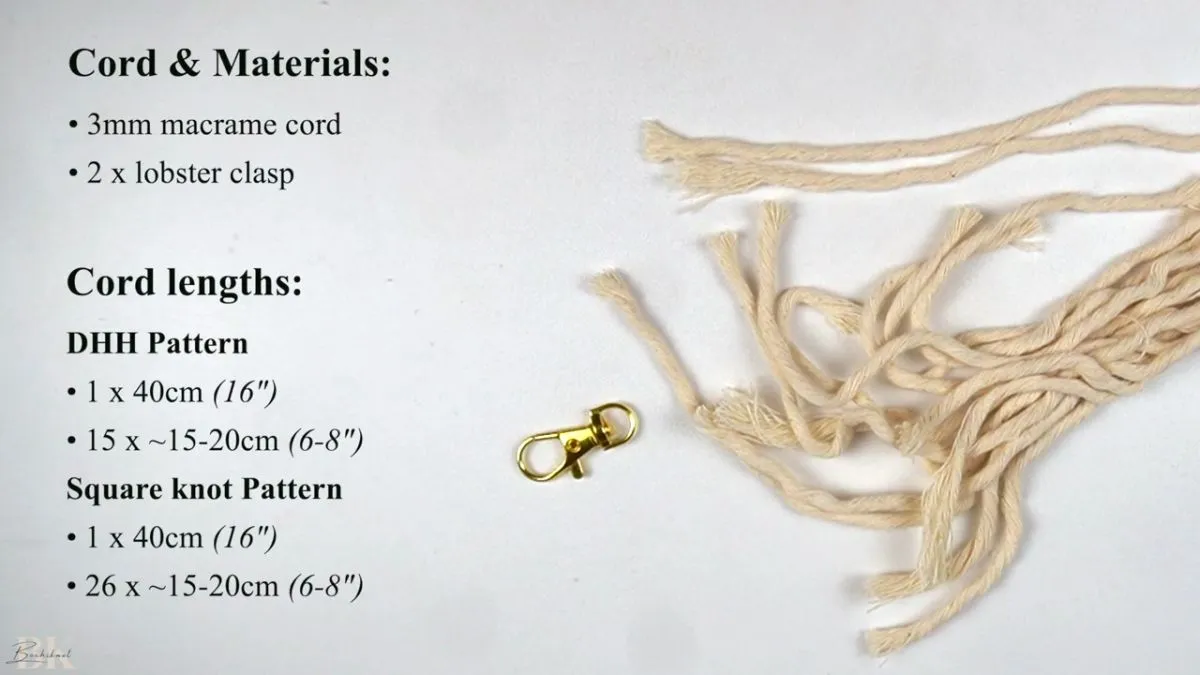
- 3mm single strand macrame cord (cotton works best — see our cord guide for help choosing)
- 2 lobster clasps (one for each feather)
- Fringe comb for brushing out the cord
- Sharp scissors for trimming
- Tape for holding things in place while you work
- Fabric stiffener or hairspray (optional, to hold the finished shape)
Cord Lengths
For the Double Half Hitch method:
- 1 anchor cord: 40cm (16")
- 15 working cords: 15-20cm each (6-8")
For the Square Knot method:
- 1 anchor cord: 40cm (16")
- 26 working cords: 15-20cm each (6-8")
The beauty of this project is that you can use up leftover cord from other projects. No need to buy anything new.
Shop Single Strand Macrame Cord
Single strand cotton cord that combs out into the fluffiest fringe. Ideal for feathers, keychains, and bookmarks. Use code KNOT10 for 10% off.
Method 1: Double Half Hitch Feather
This method creates a tighter, more structured feather that holds up well for keychains and items that get handled frequently.
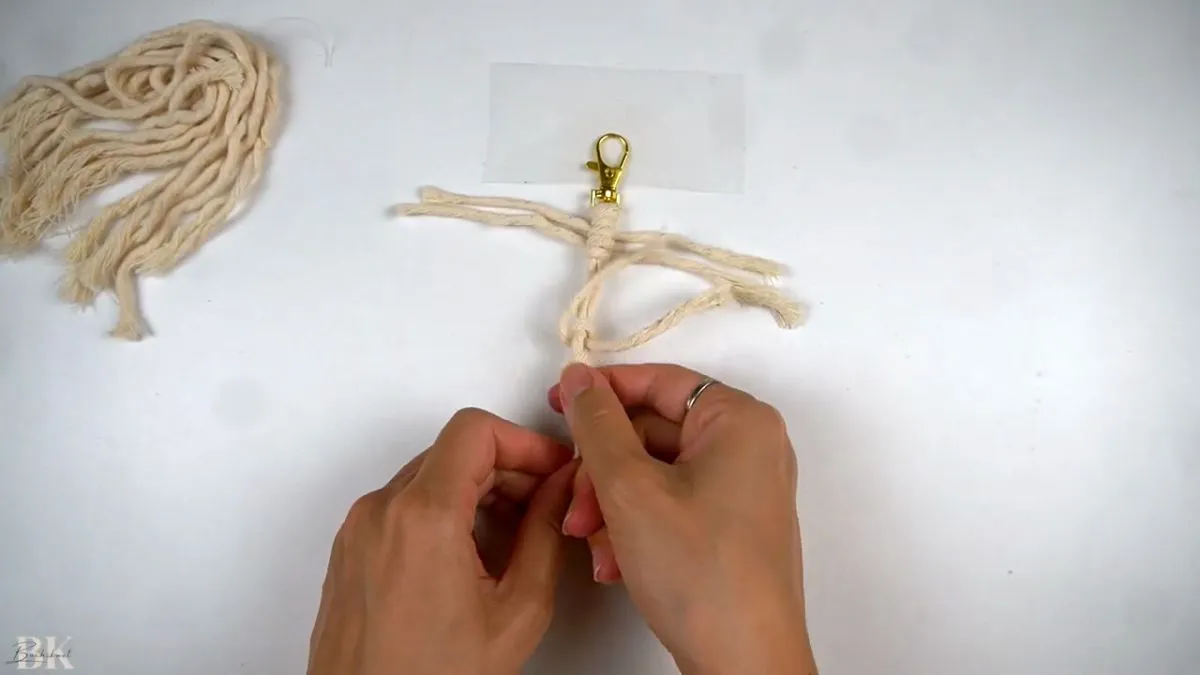
Setting Up
Take your 40cm anchor cord and attach it to the bottom of a lobster clasp using a lark's head knot. Pin or tape the clasp down to your work surface so it stays put while you knot.
Tying the Knots
Grab one of your 15-20cm working cords and follow these steps:
- Place the cord underneath both anchor cords
- Take the right end over to the left
- Bring it back underneath and over to the right
- Take the same end over to the left again, but this time go over the top of the pattern
- Pull it through the loop on the right side
- Match the ends together and pull tight
- Shift the knot upward and retighten
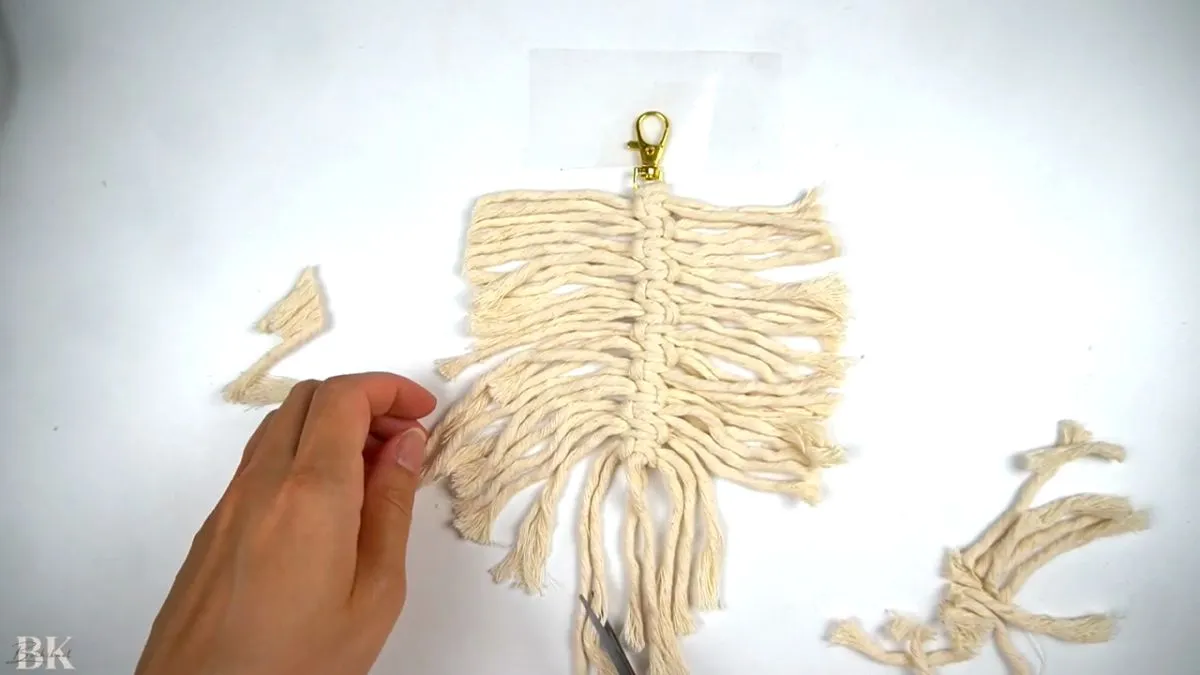
That's one double half hitch knot — if you need a refresher on this or other basic knots, our guide to 5 macrame knots every beginner should learn walks through each one in detail. Repeat this process with each working cord, moving down the anchor cord until you have about 2-3 inches of anchor cord remaining at the bottom.
You should fit around 15 strands total. If you end up with fewer, try pulling the anchor cords to shift your knots closer together — this closes up the gaps and lets you squeeze in a few more.
Finishing the Bottom
Tie an overhand knot at the bottom of the anchor cord to prevent everything from sliding off.
How to Shape Your Macrame Feathers
This step transforms a lumpy bundle of cord into something that actually looks like a feather.
Using your fringe comb, brush through both sides of the cord. Work from the tips inward, gently teasing out the fibers until all the strands are separated and fluffy. Brush everything downward.
The Tape Trick for Clean Edges
Getting a clean feather shape can be tricky when fibers keep moving around. Here's a technique that makes it much easier:
- Place a strip of tape along the center of the feather, angled outward
- Cut along the outside edge of the tape — the tape holds the fibers in place while you trim
- Repeat on the other side
- Remove the tape to reveal clean, straight edges
- Touch up any uneven spots with a final trim
Push the ends downward and fluff the fringe together for a more natural, organic look.
Keeping the Shape
Once your feather looks the way you want it, the fringe will eventually drift back out of place. To prevent this, give it a light coat of fabric stiffener spray or — a simple trick — hairspray. It adds just enough hold to keep the shape without making it feel stiff or unnatural.
Method 2: Square Knot Feather
The square knot version creates a slightly different texture. The knots sit a bit looser than double half hitches, giving the feather a softer feel.
Setting Up
Start the same way — attach a 40cm anchor cord to a lobster clasp with a lark's head knot and tape it down.
Tying the Knots
This method uses a horizontal variation of the square knot with two cords at a time:
- Take one cord, fold it in half, and place it underneath the anchor cords
- Take a second cord, fold it in half, and place it through the ends of the first cord on the opposite side
- Pull the ends of the first cord through the loop of the second cord
- Tighten both sides — you'll see it forms a shape that resembles a square knot
- Pull the anchor cords to snug everything up
Alternating for Texture
You can tie all your square knots facing the same direction, or you can alternate sides (left, right, left, right) for a woven look. To alternate, simply switch which side you start placing your cord on for each new knot.
Continue adding knots until you have about 2-3 inches of anchor cord left. You should end up with around 13 square knots total, using 26 strands of cord. Finish with an overhand knot at the bottom, trim any excess, then comb and shape the fringe just like the first method.
Which Method Should You Choose?
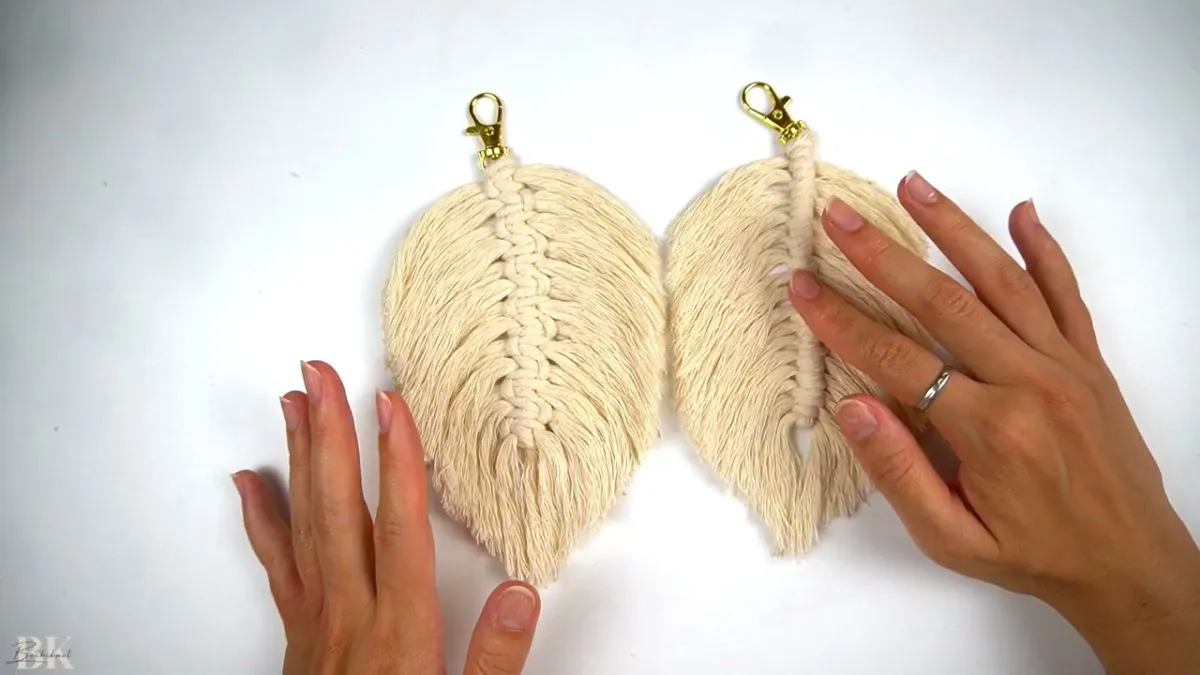
Both methods produce gorgeous feathers, but they have different strengths:
-
Double half hitch knots are tighter and more secure. Choose this method for keychains, bag charms, or anything that will get moved around a lot. The knots won't come undone as easily with daily use.
-
Square knots create a softer, more relaxed look. They're ideal for wall hangings, bookmarks, and decorative pieces that won't be handled constantly.
If you're not sure, try both and see which texture you prefer. You'll likely find uses for each style.
Tips and Troubleshooting
A few things that can trip up beginners:
- Feather looks lopsided? Make sure you're matching the ends evenly when tightening each knot. Even small offsets add up over 15 knots.
- Fringe won't comb out smoothly? Your cord might be too tightly twisted. Try combing smaller sections at a time, working from the tips upward.
- Knots keep sliding down? Pull the anchor cords taut and shift knots upward before adding the next one. Pinning helps.
- Which cord is best? Single strand cotton cord gives the fluffiest fringe. Braided cord won't unravel properly for this project.
- Feather won't hold its shape? A light coat of hairspray works surprisingly well. Fabric stiffener gives a firmer hold if you need it.
Need Cord for Your Next Feather Project?
Stock up on cotton cord in a range of sizes. Great for feathers, wall hangings, and all your macrame projects. Use code KNOT10 for 10% off.
What's Next
Once you're comfortable making macrame feathers, they become a versatile building block. Use them as earrings, add them as accents to wall hangings, or string several together for a feathered garland. If you're ready for a slightly bigger project, a macrame plant hanger is another great beginner-friendly build. And if you're just getting started with macrame overall, our complete beginner's guide covers everything from cord types to essential knots.