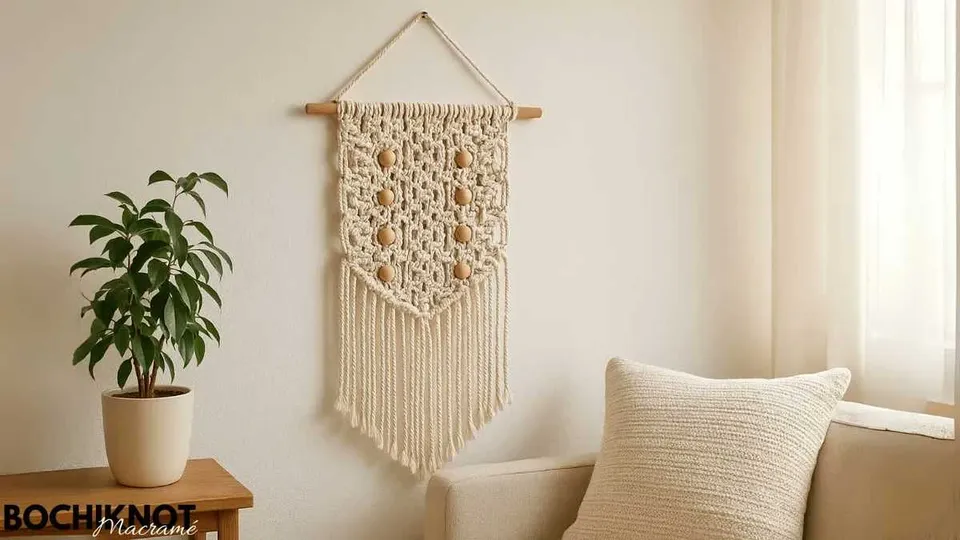
This beginner macrame wall hanging with beads uses only two knots (the square knot and the lark's head knot) to create a beautiful piece of wall art. The finished size is 12 inches wide by 15.5 inches long, and the entire project takes about 45 to 60 minutes. If you can tie a square knot, you can make this.
Some links in this article are affiliate links. If you make a purchase through them, we may earn a small commission at no extra cost to you. We only recommend products we genuinely use and trust.
Materials You'll Need
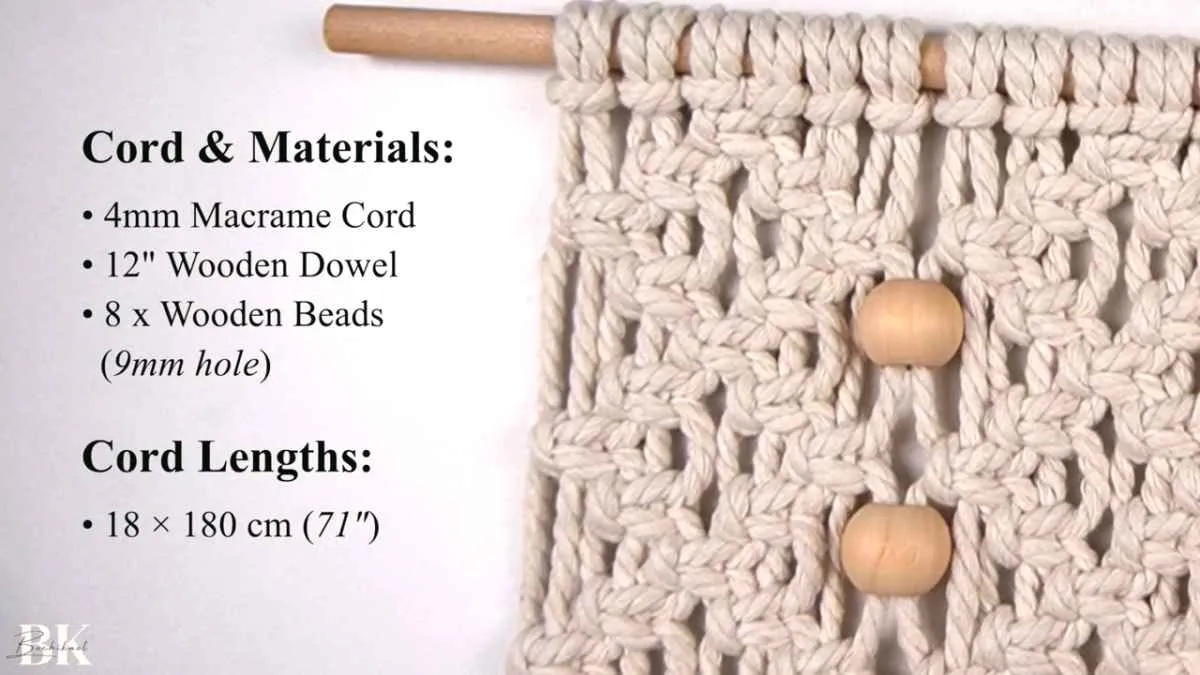
Here's everything you need for this project:
- 4mm macrame cord (3-ply twisted): 18 strands at 180cm (71 inches) each, plus one 50cm scrap piece for the handle
- 12 inch wooden dowel: one piece
- Large hole wooden beads: 8 beads with a 9mm hole (the hole needs to fit two strands of 4mm cord)
The 3-ply twisted cotton cord works best for this project because it's sturdy enough to hold the diamond pattern but still soft enough to work with comfortably. If you need help picking the right cord, our macrame cord guide breaks down all the options.
Shop Macrame Cord for Wall Hangings
Quality 3-ply twisted cotton cord perfect for diamond patterns and bead work. Our go-to source for macrame supplies. Use code KNOT10 for 10% off.
About the Beads
The bead hole diameter matters. You need at least a 9mm hole to thread two strands of 4mm cord through. The beads used here are about 16mm (1.6cm) in total length. If your beads have a smaller hole, you can use a tapestry needle or wrap the cord ends in tape to thread them through more easily.
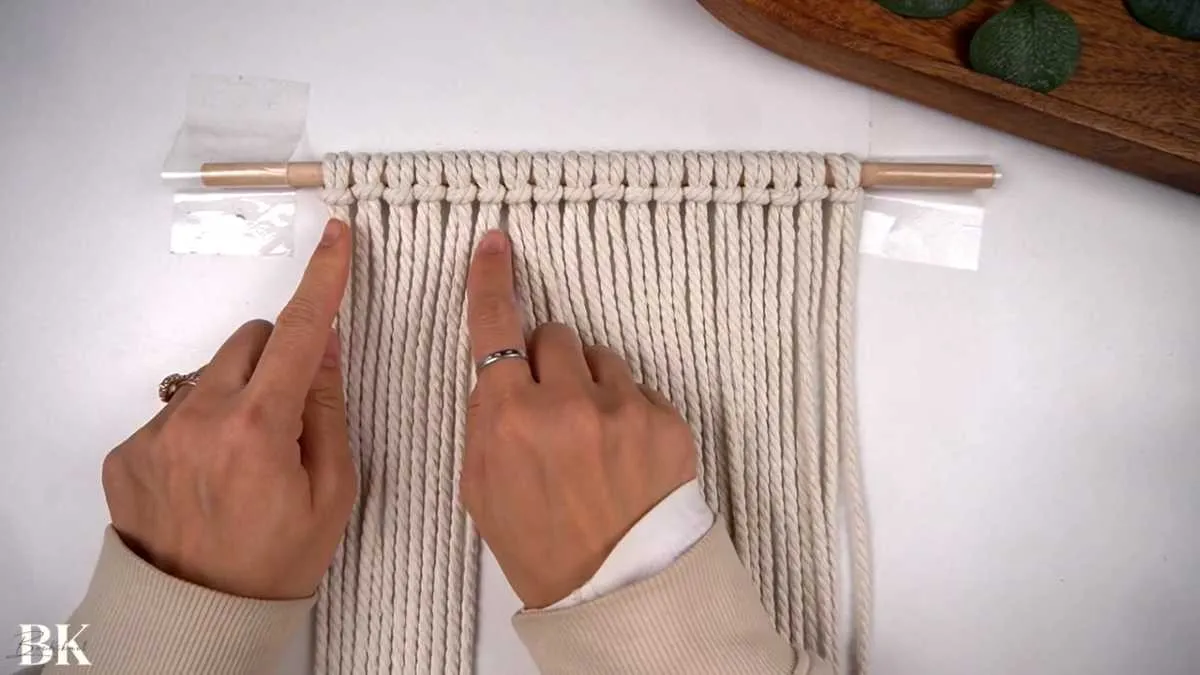
Step 1: Attach Cords to the Dowel
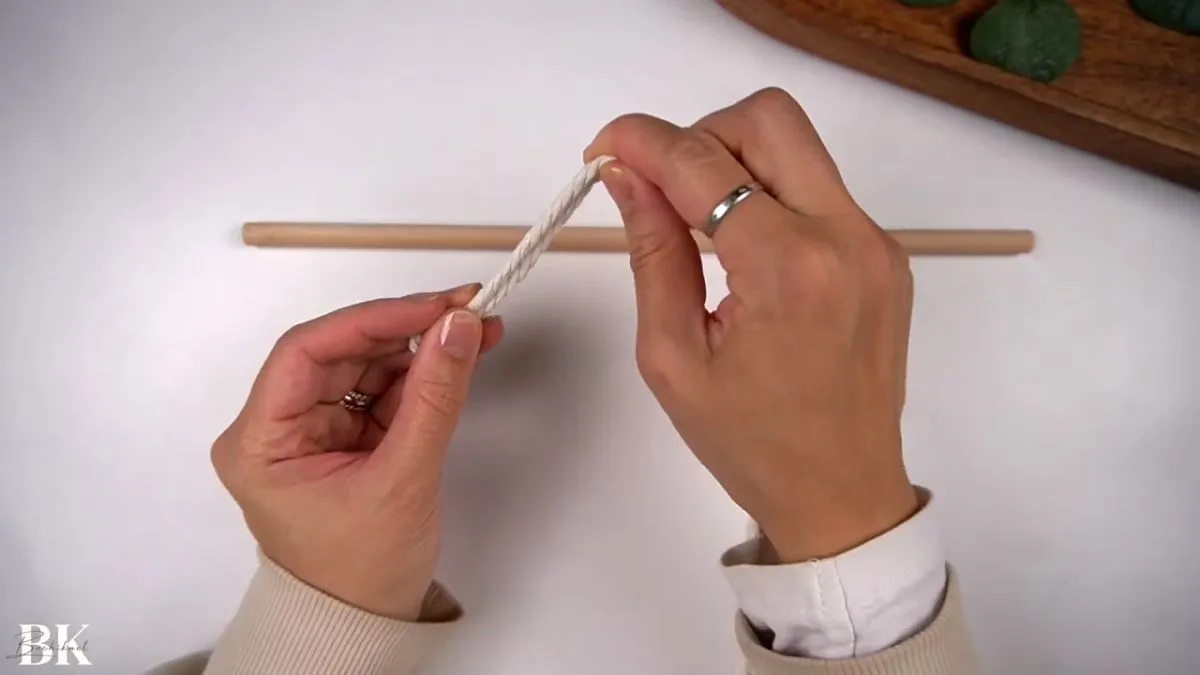
Fold each 180cm cord in half and attach it to the dowel using a lark's head knot. Place the folded loop behind the dowel, bring it over the top, and pull the cord ends through the loop. Tighten by pulling down on both ends.
Repeat this 18 times until all strands are mounted. You should now have 36 cord ends hanging from the dowel. Tape the dowel down on both sides to keep it from moving while you work.
If you're new to this knot, our guide to 5 macrame knots every beginner should learn walks through each one in detail.
Step 2: Create the First Row of Square Knot Diamonds
Split your 36 cords into 3 equal sections of 12 cords each (left, center, right). You'll make one square knot diamond in each section.
How to Make a Square Knot Diamond
Working with the left section of 12 cords:
- Take the center 4 cords and tie a square knot (left cord over, right cord over, then reverse)
- On the next row, shift 2 cords to the left: take 2 cords from the previous knot plus 2 new cords from the left and tie a square knot. Do the same on the right side
- Continue expanding diagonally until you have 3 square knots across
- Then reverse the process, narrowing back down to 1 knot at the center
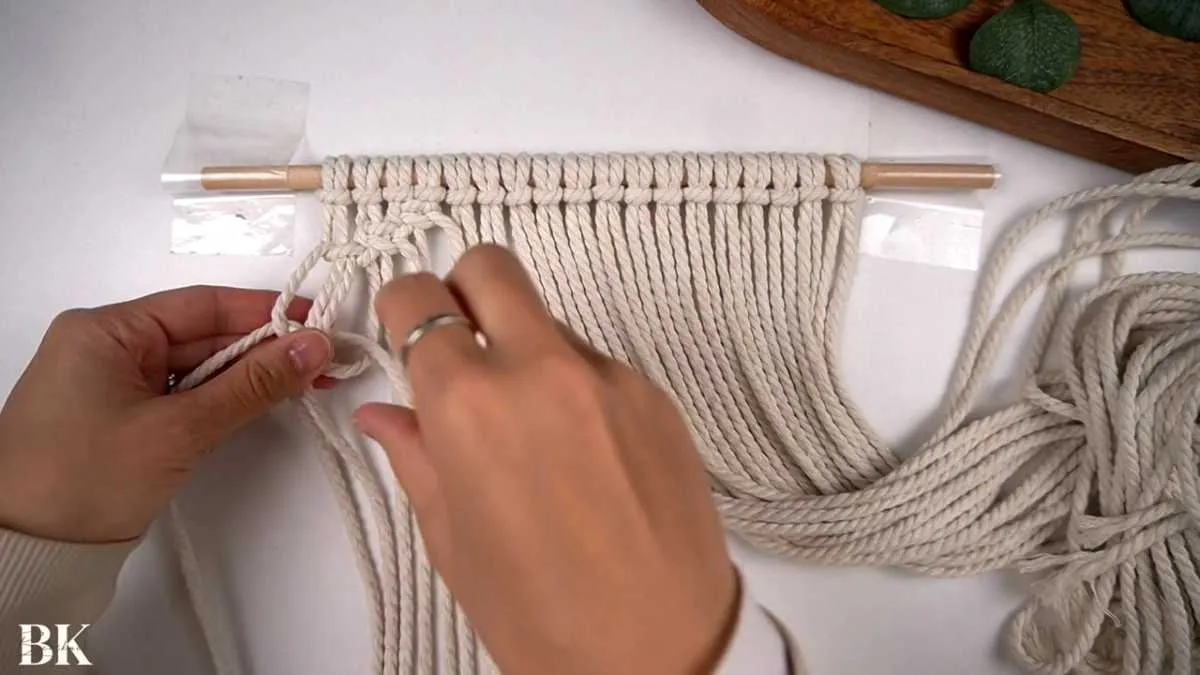
After every square knot, pull on the inner filler cords to keep things tight and neat. This prevents the cords from bunching up and keeps your diamond shape symmetrical.
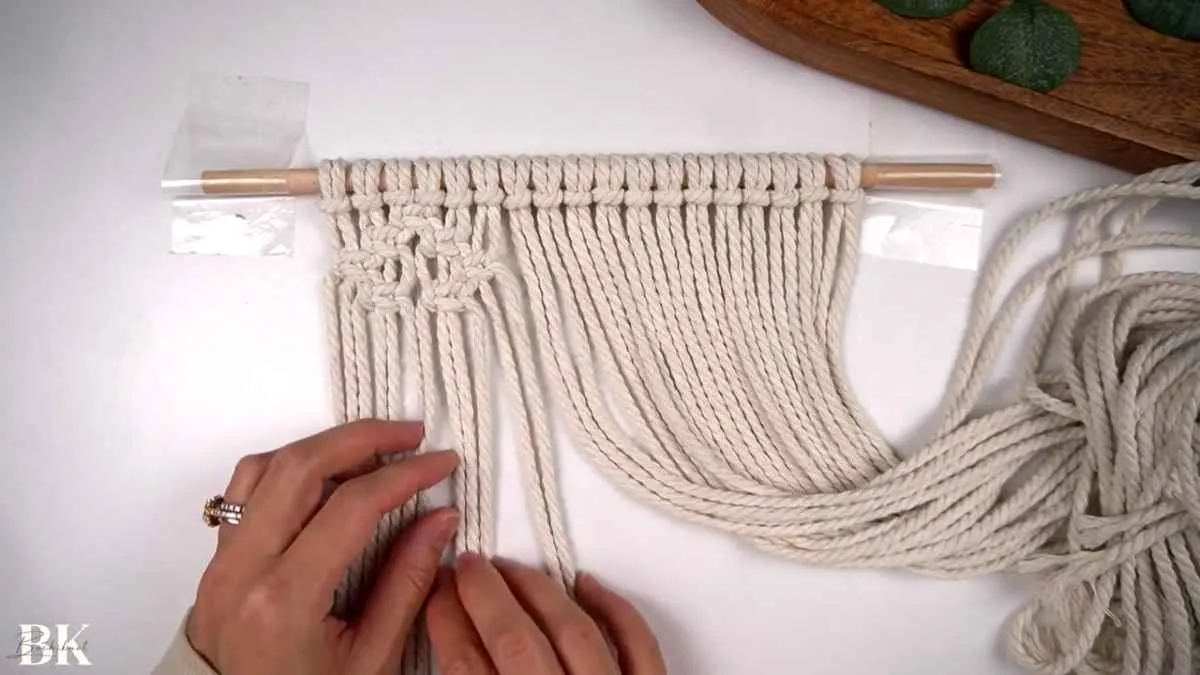
Repeat the same diamond pattern for the center and right sections. Once all three diamonds are complete, you've finished the first row.
Pro tip: After each square knot, straighten the working cords before starting the next one. This keeps the pattern clean and prevents tangles.
Step 3: Thread the First Row of Beads
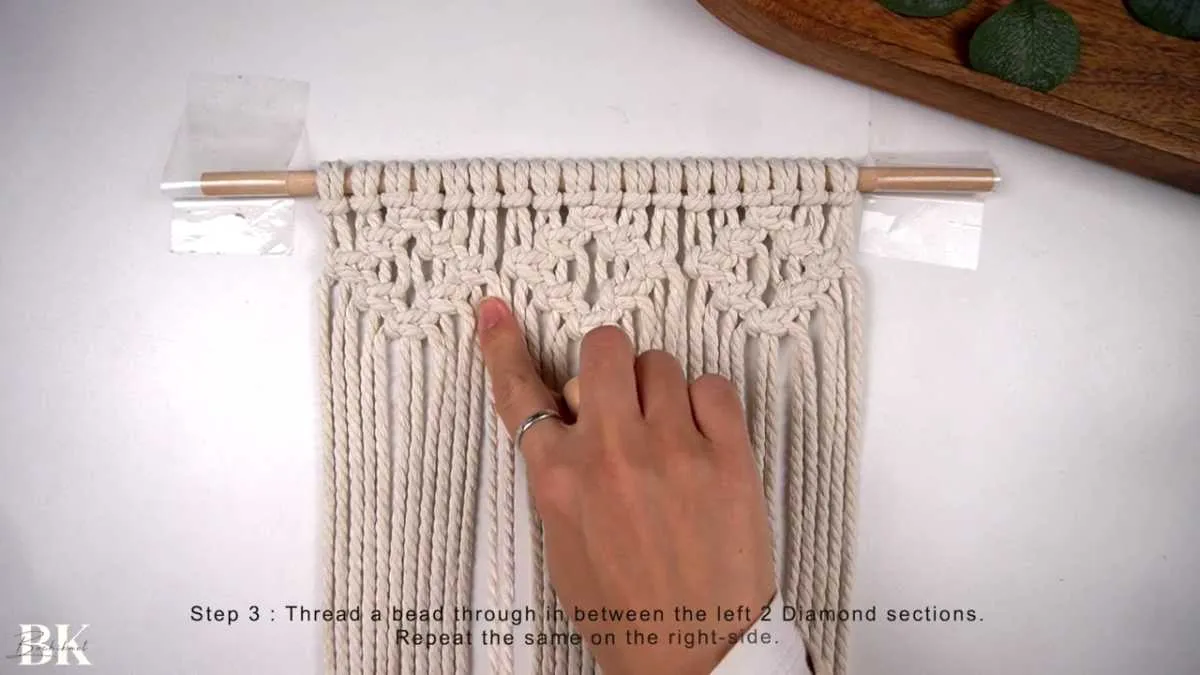
Take the 2 cords that hang between the left and center diamond sections and thread them through one wooden bead. Push the bead up snugly against the bottom of the diamonds. Repeat with the 2 cords between the center and right sections.
If the cord won't slide through the bead easily, try wrapping the ends in a small piece of tape to create a stiff point. You can also use a tapestry needle as a threading tool.
Step 4: Make the Second Row of Macrame Diamonds
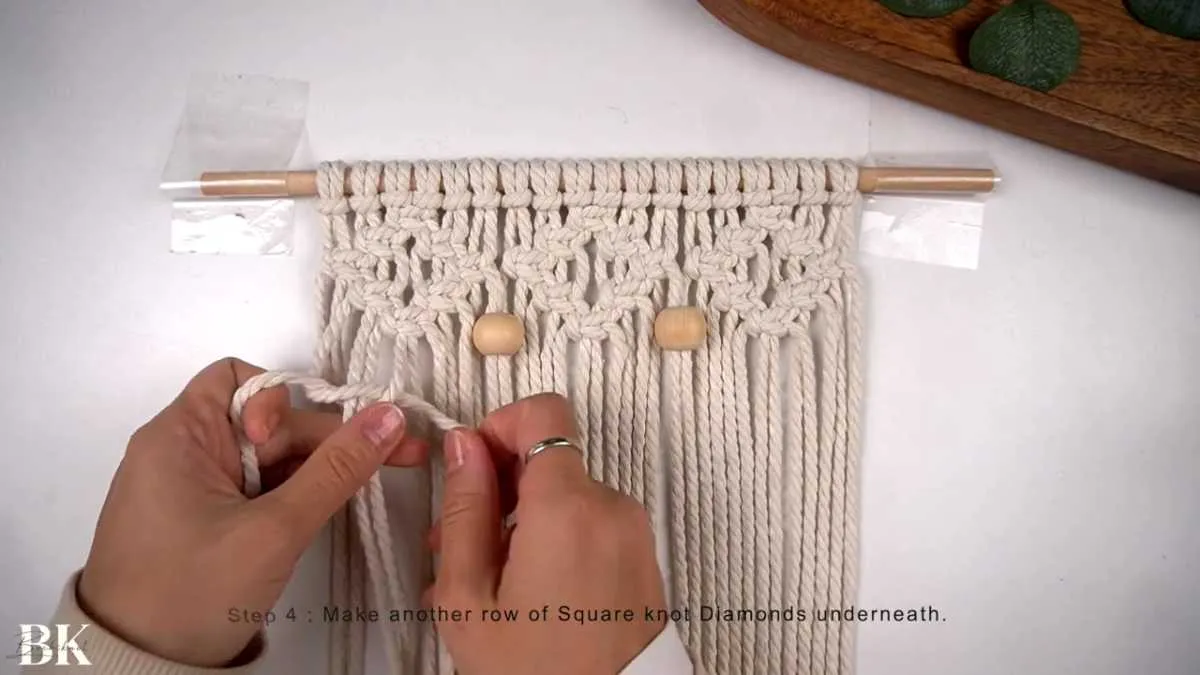
Create another row of 3 square knot diamonds directly below the beads, following the same process as Step 2. The pattern is identical: start with 1 square knot at the center, expand diagonally to 3, then narrow back to 1.
Step 5: Add More Beads and Continue the Pattern
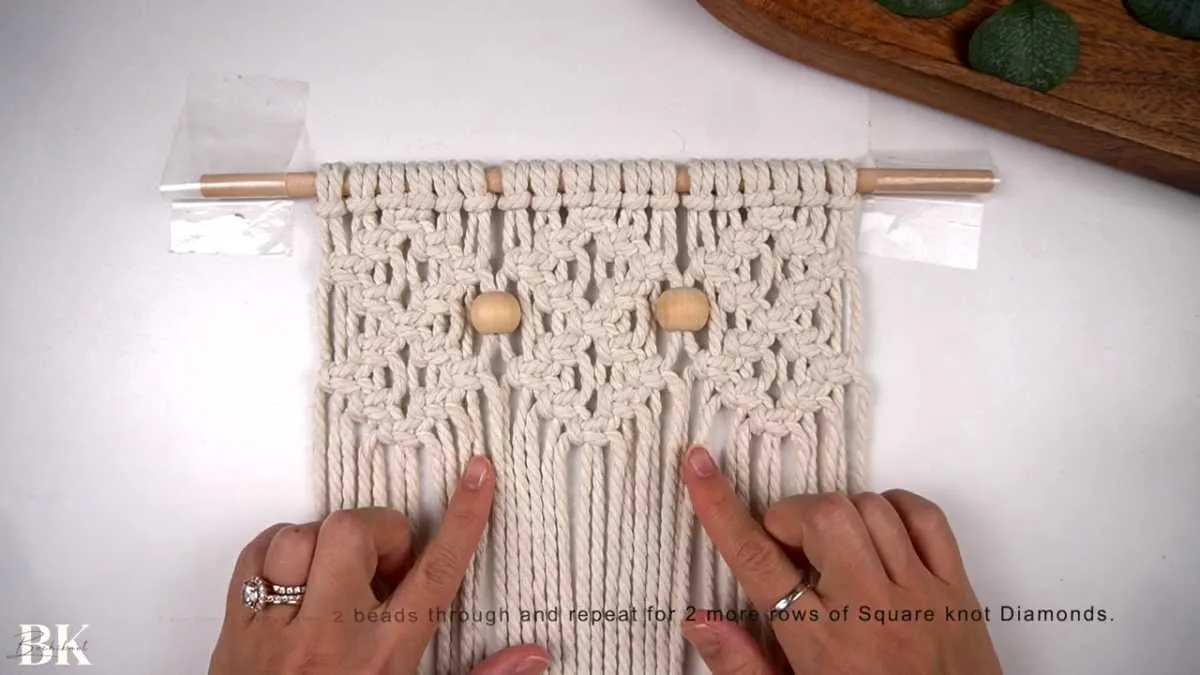
Thread 2 more beads between the diamond sections (same as Step 3), then make 2 more rows of square knot diamonds. At the halfway point, your piece should have a repeating pattern of diamonds separated by beads.
Step 6: Finish with a Center Diamond and Diagonal Rows
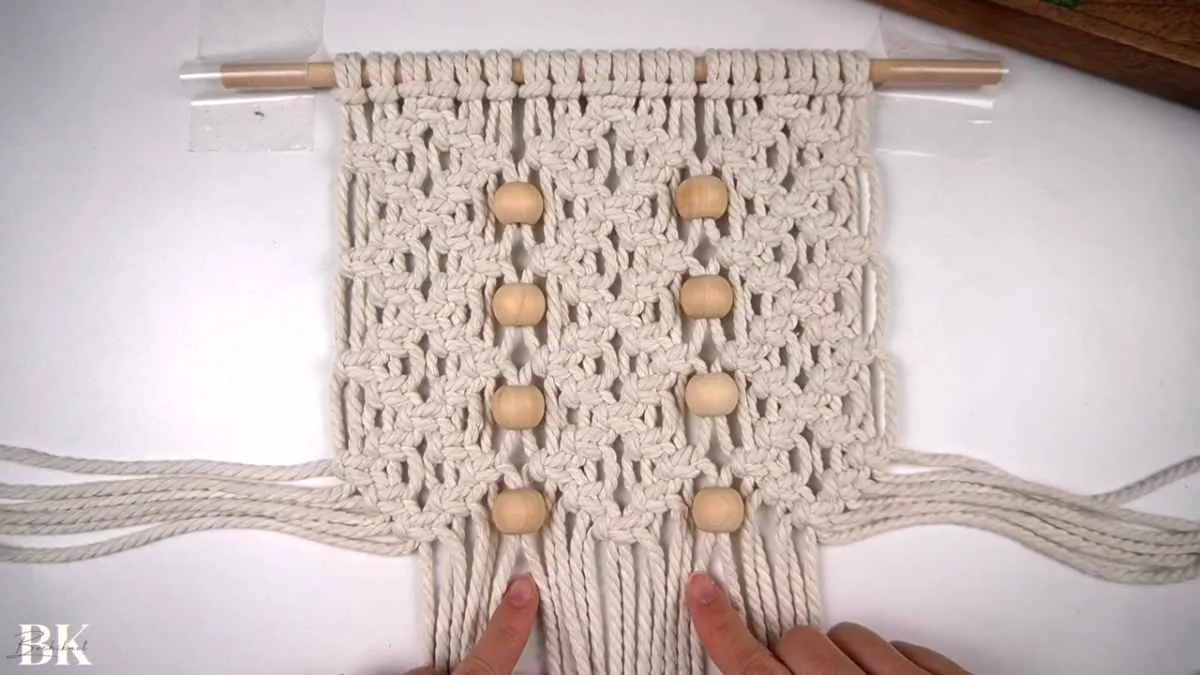
For the final knotting section, make one more square knot diamond using only the center 12 cords. Then add a diagonal row of square knots on both sides, angling outward. This creates a V-shape at the bottom that transitions into the fringe.
Step 7: Trim the V-Shaped Fringe
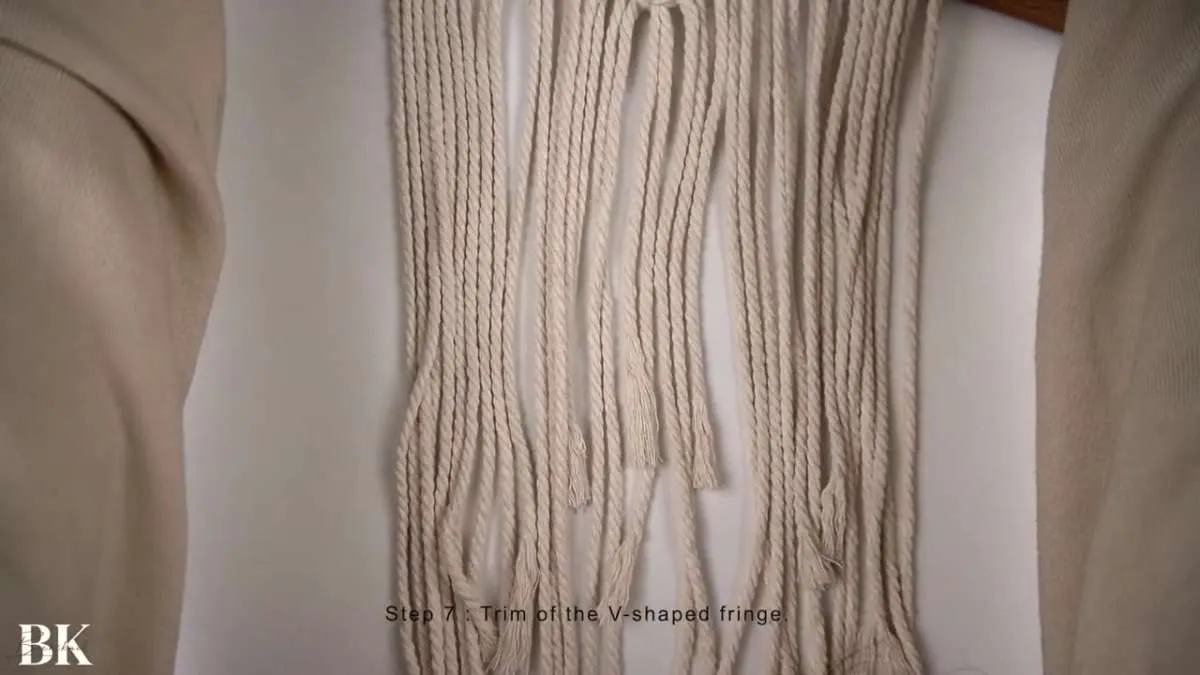
Flip the wall hanging over or lay it flat. Starting from the shortest cord in the middle, work outward and trim the fringe into a V shape. A few things that help:
- Make sure the cords aren't overlapping before you cut
- Lay them flat and separate so you can see each strand clearly
- Start longer than you think you need, then trim shorter gradually
- Check both sides are even by folding the piece in half
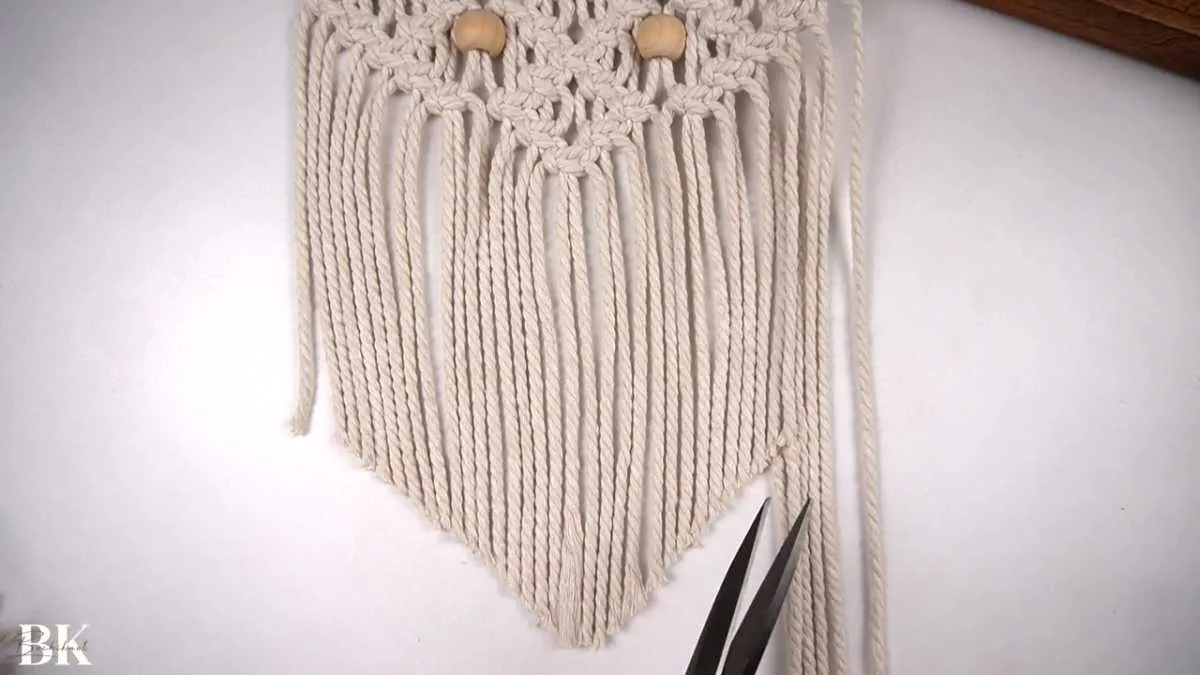
If the V isn't perfectly even on your first pass, fold the piece in half, line up the shortest cords in the center, and trim the longer side to match.
Step 8: Add the Hanging Handle
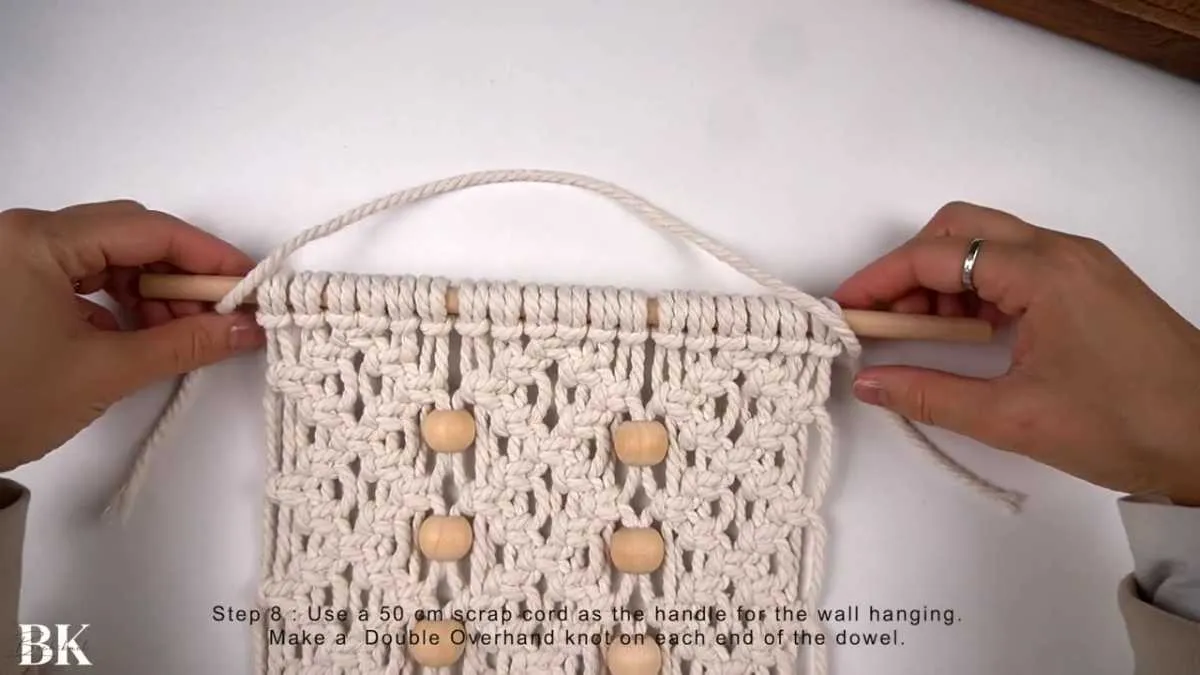
Take your 50cm scrap cord and tie a double overhand knot around each end of the dowel. This creates a simple loop handle for hanging. Adjust the length to your preference, keeping both sides even.
Flip the wall hanging over, and you're done.
Tips and Troubleshooting
- Diamonds look uneven? After finishing each diamond, pull on the inner filler cords to tighten everything. You can also loosen and retie individual knots if something shifted.
- Beads won't thread? Wrap the cord tips in tape or use a large-eye tapestry needle. Make sure your bead holes are at least 9mm.
- Cords getting tangled? Tape the dowel down firmly and straighten all cords before starting each section. Work from left to right consistently.
- V-shape looks crooked? Fold the piece in half to compare sides. Trim the longer side to match the shorter one.
- How tight should the knots be? Snug but not forced. Over-tightening makes the diamonds pucker. Under-tightening makes them look sloppy.
The Finished Macrame Wall Hanging

The finished piece measures 12 inches wide by 15.5 inches long. It looks beautiful on its own or as part of a gallery wall arrangement. If you want to make it even more personal, try experimenting with colored cord, different bead materials, or a natural branch instead of a dowel.
Ready to Start Your Wall Hanging?
Pick up quality cotton cord and everything else you need for this project. Bochiknot carries all the essentials. Use code KNOT10 for 10% off.
What's Next
Once you've made this wall hanging, you've got the square knot diamond technique down, and that opens up a lot of possibilities. Try scaling it up with a longer dowel and more cords for a statement piece, or check out our macrame wall hanging ideas for design inspiration. If you want to try a different type of project using similar knots, a macrame plant hanger is another great beginner build.